
The Best Developer Notebook Obisidian
A Review of Obsidian, As Seen from the view of a Programmer
For years I’ve been using Quiver to take my notes in Markdown. Recently I’ve migrated to Obsidian — a robust note-taking app that transcends basic notes to become a full-fledged knowledge management system. In this post, I’ll share my thoughts on why I chose Obsidian and what makes it stand out as a programmer’s best friend.
Obsidian stands out for several reasons:
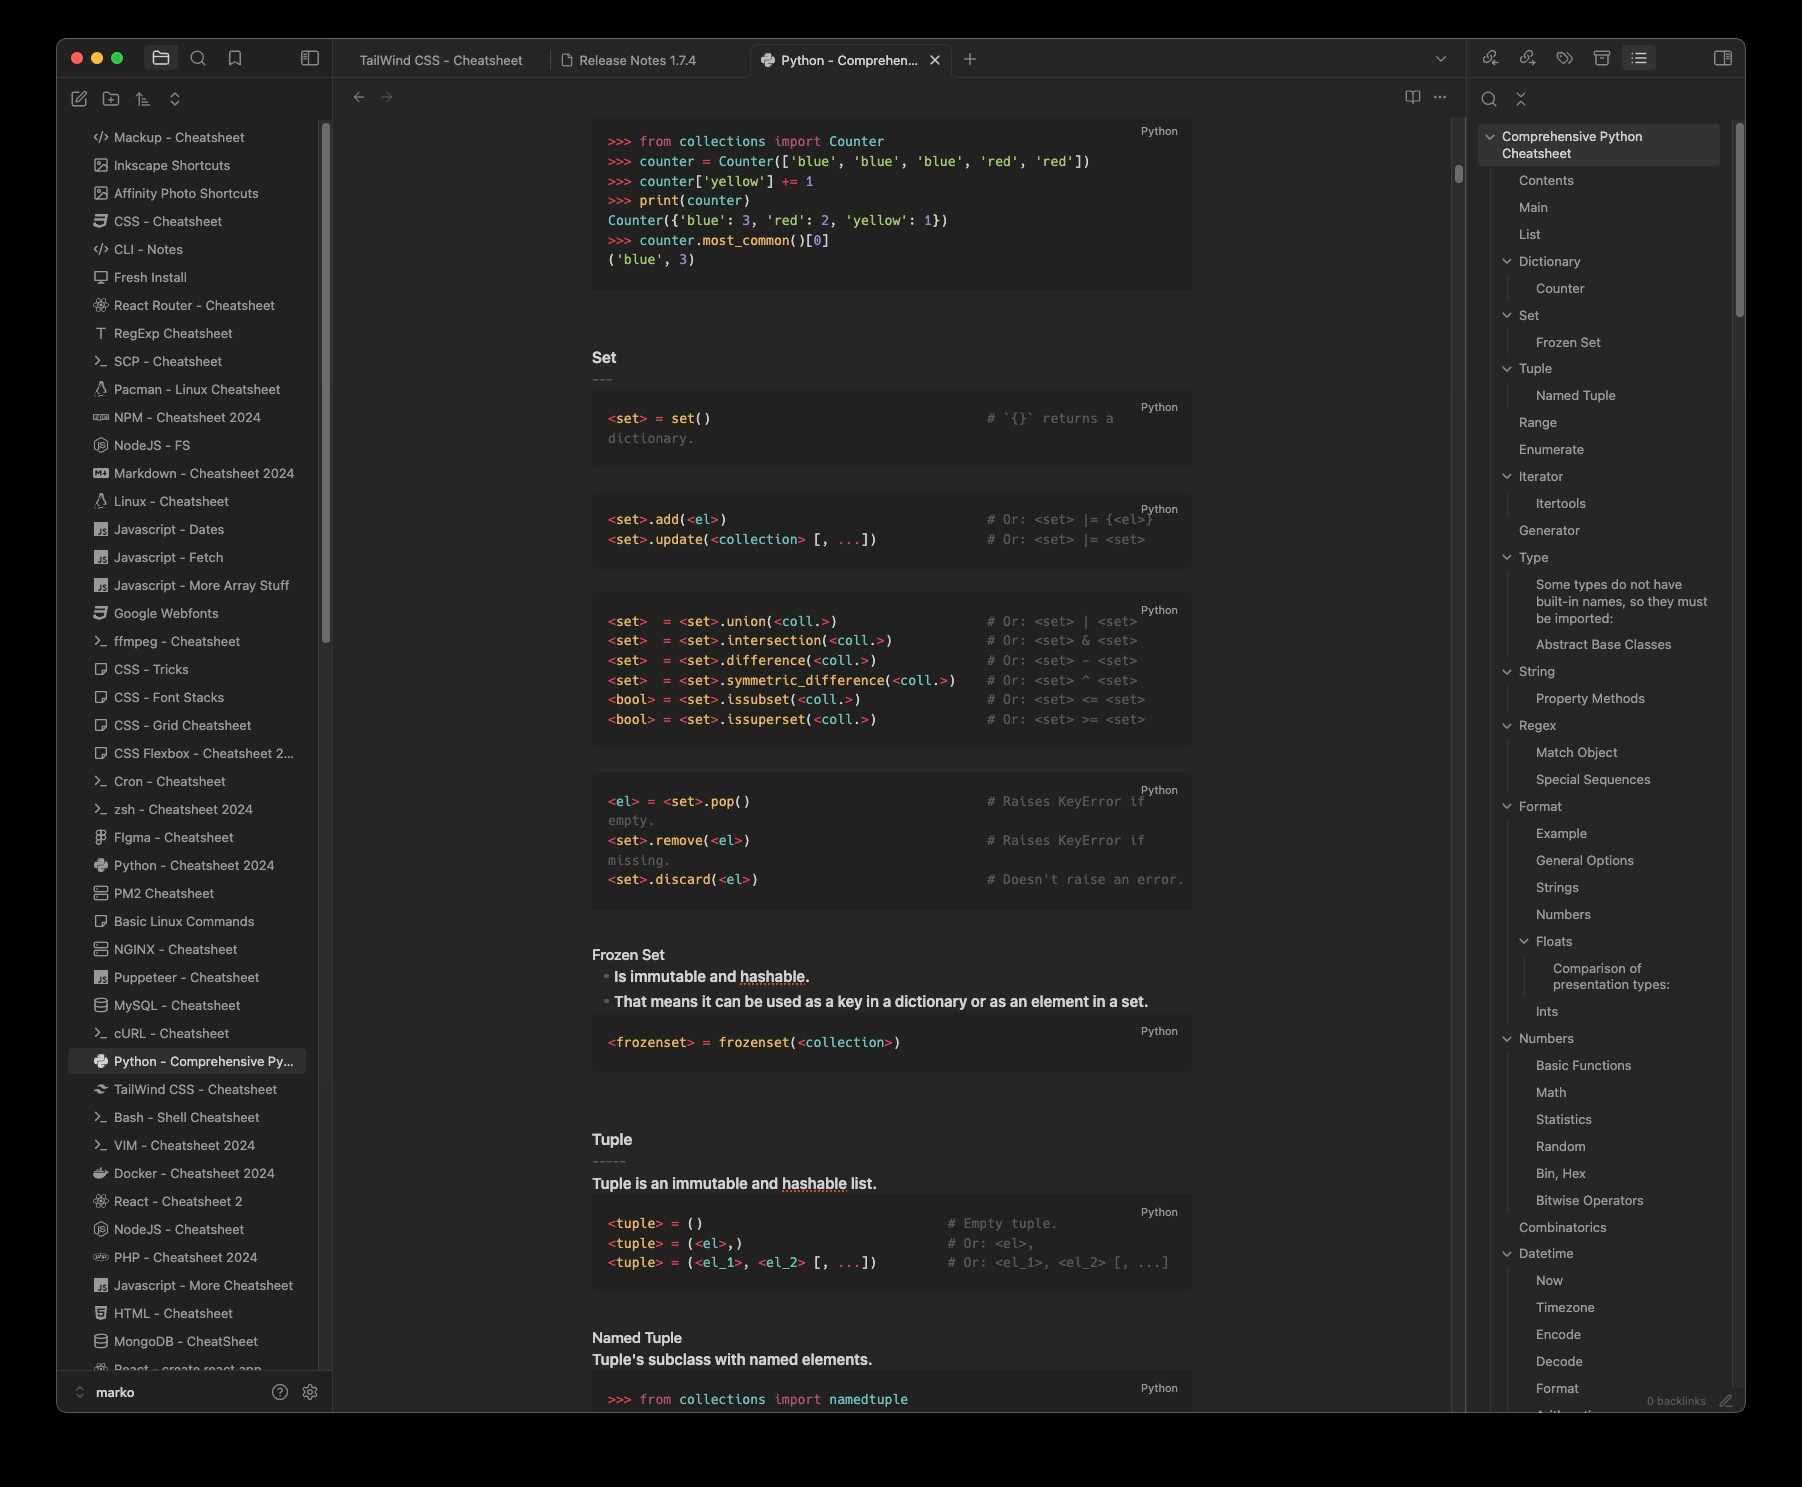
- Markdown-Based: Notes are stored in
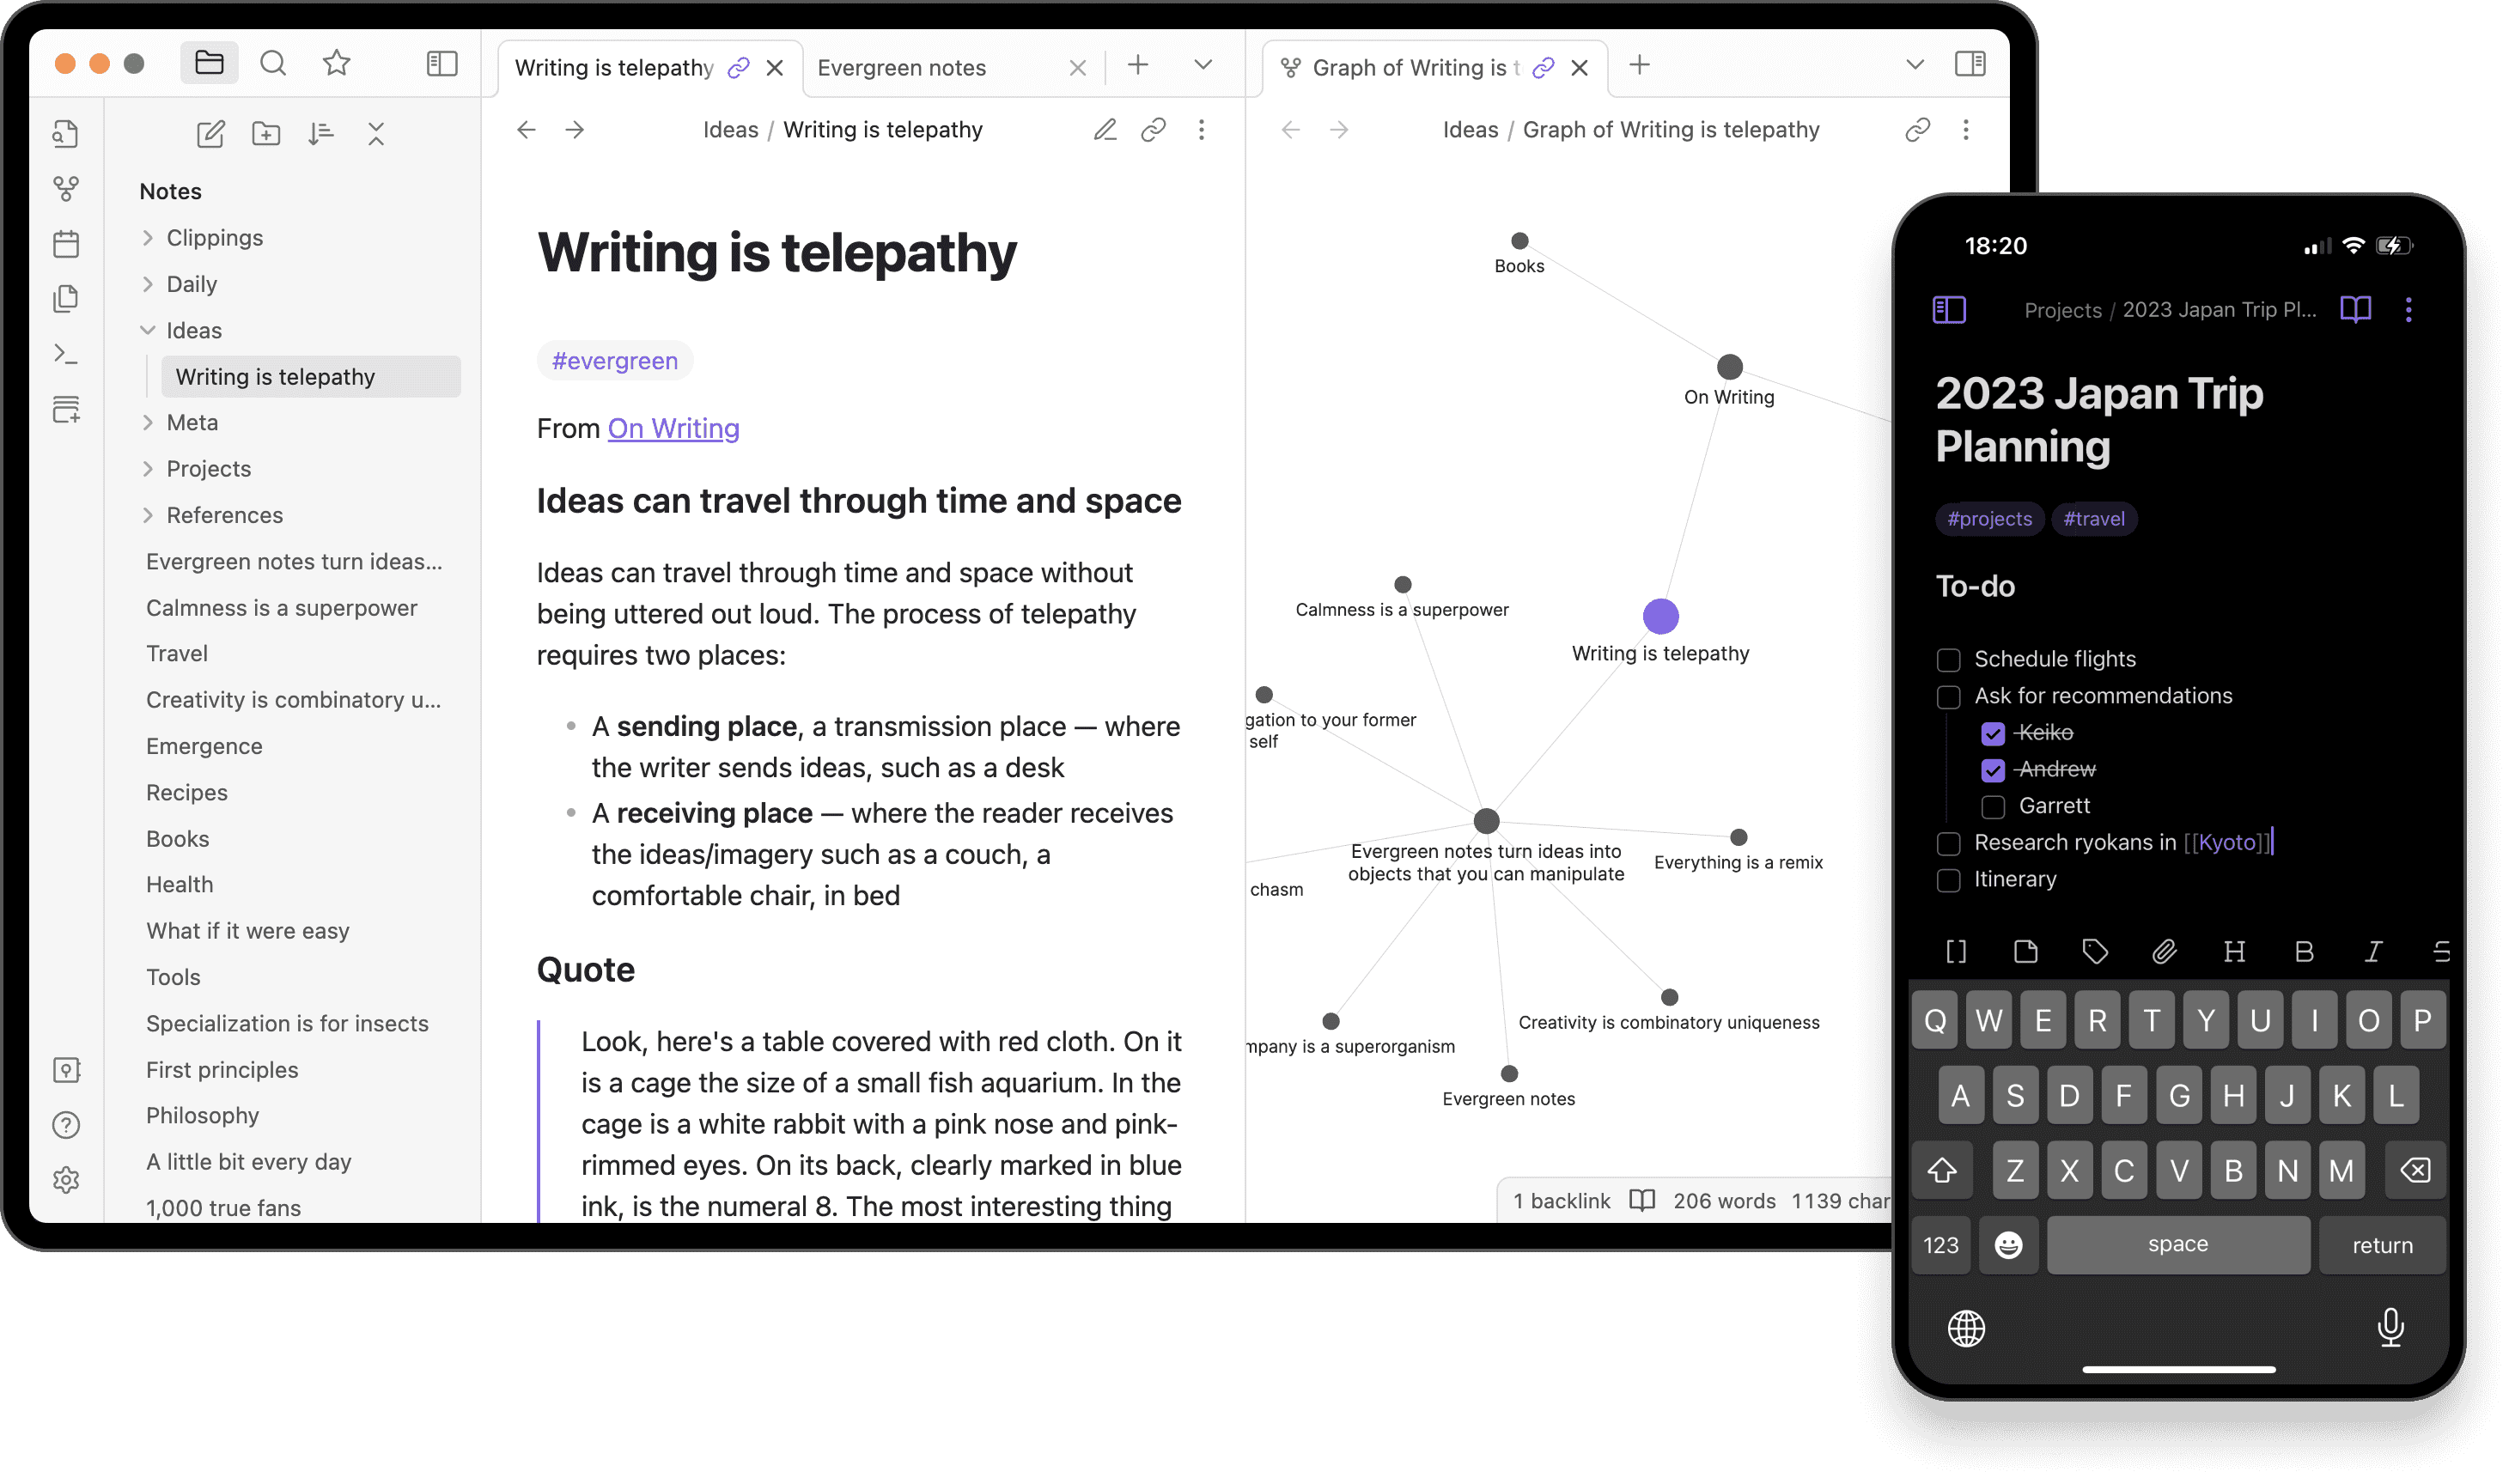
Markdownfor easy formatting and export. - Bidirectional Linking: Create interconnected notes, helping to visualize complex ideas and systems.
- Graph View: Visualize relationships between notes, like a mind map, to better understand the connections between concepts.
- Plugins and Customization: Tailor the app with a dumb amount of open source plugins and a built in manager for them.
- Offline Access: Store notes locally for anytime access, no internet required.
- Cross-Platform: Works on
Windows,macOS, andLinux, ensuring accessibility on any OS. - Free and Open Source: Free to use, with an open-source codebase for community contributions.
- Extensive Documentation: Comprehensive documentation, tutorials, and community forums.
- Customizable Templates: Create templates for different types of notes, such as project outlines or meeting notes.
- Tagging System: Use tags to categorize notes, making it easier to find related information quickly.
- Version Control: Integrate with
Gitto track changes in your notes, ensuring that you can revert to previous versions if needed. - Search Functionality: Quickly find notes with a powerful search tool that indexes your entire vault.
- Canvas: Mindmap-like canvas for brainstorming and organizing ideas.
- Themes: Was simple to mod someone else’s theme to my liking.
Installing Obsidian via Homebrew
For macOS users, installing Obsidian is a breeze using Homebrew. Here’s a quick step-by-step guide:
-
Open Terminal: You can find this application in your Utilities folder or by searching for it.
-
Install Homebrew (if you haven’t already): Run the following command to install Homebrew, the package manager for macOS.
/bin/bash -c "$(curl -fsSL https://raw.githubusercontent.com/Homebrew/install/HEAD/install.sh)" -
Install Obsidian: Once Homebrew is installed, you can easily install Obsidian with the following command:
brew install --cask obsidian -
Launch Obsidian: After installation, you can find Obsidian in your Applications folder or launch it directly from Terminal using:
open -a Obsidian
Obsidian isn’t just a note-taking app; it’s a productivity powerhouse for programmers. Its unique features and flexibility make it perfect for managing all your knowledge base needs effectively.
Whether you’re coding, working on projects, or learning new languages, Obsidian helps you stay organized. Give it a go and let me know what you think.